Provisioning on your local Xen/KVM/VMWare
The following is a step-by-step tutorial to get you started with ComodIT and provision your first host on your local Xen, KVM, or VMWare hypervisor. If you get into troubles while following this guide, have a look at our support section for help.
1. Pre-requisites
a. You have a ComodIT account
We assume that you already have created an account on ComodIT and verified your email by clicking the link we sent you. If you have issues subscribing to our service, please contact support.
b. You have setup a hypervisor
We also assume that you have already a running virtualization platform such as Xen, KVM or VMWare.
2. Log-in ComodIT for the first time
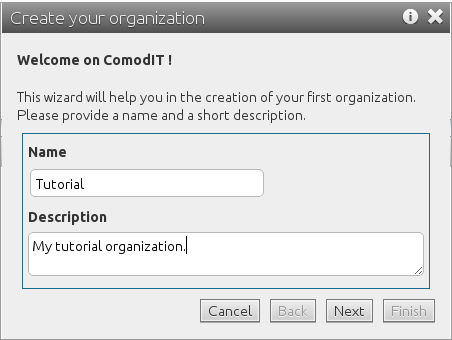
When you log-in for the first time in ComodIT, a dialog pops up and invites you to create your first organization. It will keep on re-appearing as long as you don’t have at least one organization in your account (either you have created it, or someone adds you to an existing organization).
3. Create your first organization
If you don’t yet have one, you first have to create a new organization. This organization will act as a container for your hosts and applications recipes. The organization can be shared between multiple users. Pick a name (has to be unique within the whole of ComodIT) and enter a short description (this is not required). When your new organization is created, it will also be populated with a sample distribution and application so that you can quickly start provisioning your first host.
4. Get your organization’s access keys
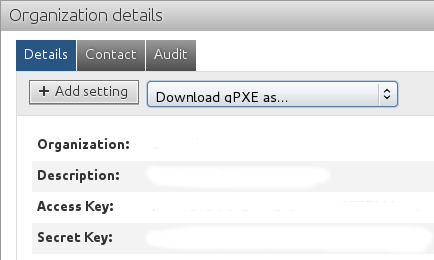
Go into the ‘Organizations’ section, select your organization in the list and write down access key and secret key displayed in ‘Details’ tab.
5. Install the ComodIT Agent
In order to let ComodIT manage your local hypervisors, you must install a small gateway agent in your infrastructure. That agent will provide the bridge between ComodIT and your infrastructure. You can install the agent directly on one of your hypervisors, or on a standalone machine that will connect remotely to your hypervisors.
To install the agent, you must install the packages comodit-agent and comodit-agent-plugin-hypervisors available in ComodIT repository.
Fedora/CentOS Users
Add ComodIT repository by executing the following command:
- On CentOS 6:
rpm -ivh http://dl.comodit.com/pub/centos/6/x86_64/comodit-release-6-4.el6.noarch.rpm - On Fedora 20:
rpm -ivh http://dl.comodit.com/pub/fedora/20/x86_64/comodit-release-20-1.fc20.noarch.rpm
- On CentOS 6:
Install packages with command
yum install comodit-agent comodit-agent-plugin-hypervisors.
Ubuntu/Debian Users
Add ComodIT repository by executing the following command:
 cat <<EOF > /etc/apt/sources.list.d/comodit.list
 deb http://dl.comodit.com/pub DIST main
 EOF
where DIST must be replaced by
debian-squeezeorubuntu-12.Install repository key:
wget http://dl.comodit.com/pub/comodit.asc -O /tmp/key; apt-key add /tmp/key; rm -f /tmp/keyInstall packages with command
apt-get update; apt-get install comodit-agent comodit-agent-plugin-hypervisors.
6. Configure the ComodIT Agent
Edit the file /etc/comodit-agent/comodit-agent.conf with the following content:
[bootstrap]
register = True
host = my.comodit.com
username = <access_key>
password =  <secret_key>
7. Add your hypervisors to the ComodIT Agent
Edit the file /etc/comodit-agent/plugins/hypervisors.conf to add your local hypervisors. The following is a simple configuration to use when the ComodIT agent is directly installed on a KVM hypervisor. You can find additional examples of hypervisor configurations at the end of this tutorial.
[general]
mount_point_path = /var/lib/comodit-agent/data
domain_template_file_path = /usr/share/comodit-agent/plugins/hypervisors/templates/domain.tmpl
disk_template_file_path = /usr/share/comodit-agent/plugins/hypervisors/templates/disk.tmpl
vncproxy_host = my.comodit.com
vncproxy_port = 31338

[kvm]
url = qemu:///system
hyp_type = kvm
emulator_path = /usr/libexec/qemu-kvm
mount_point_path = /var/lib/comodit-agent/data
8. Start the ComodIT agent
Launch the agent service (named comodit-agent). For example service comodit-agent start on a CentOS system.
Useful information is logged in ‘/var/log/comodit-agent/messages.log’. In case of issues, do not hesitate to contact
our support.
9. Agent and Hypervisors appear in ComodIT
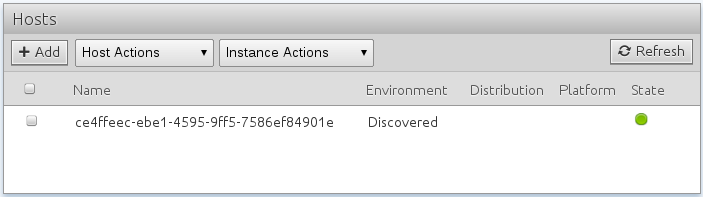
When the ComodIT agent starts, it authenticates and registers with ComodIT. When this is done, the agent appears in your ‘Hosts’ list, inside a ‘Discovered’ environment. All platforms added to your configuration also appear in the ‘Platforms’ section and can be used to provision a host.
10. Create a new host
You are now ready to provision your first host. Go to the ‘Hosts’ section if you are not already there. Click the Add button and you are presented with a new wizard, guiding you in the host creation process.
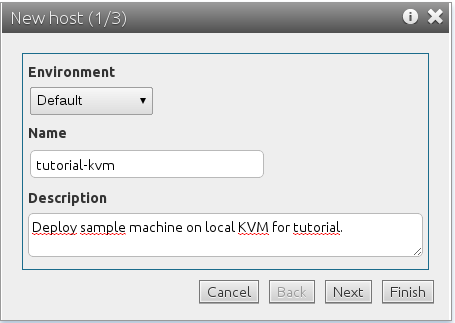
You can leave the environment as Default, pick a name and enter a short description. Environments help you group hosts within your organization (e.g. by type, geographies, teams, etc.). The name of the host has to be unique within a given environment. When you are done, click Next.
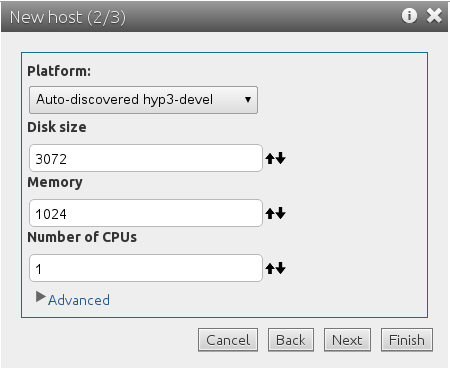
11. Pick a platform
The next step in the host creation process is to decide where you want to deploy the machine and its hardware characteristics. In this case, pick one of the hypervisor that was registered in the previous step. Click Next.
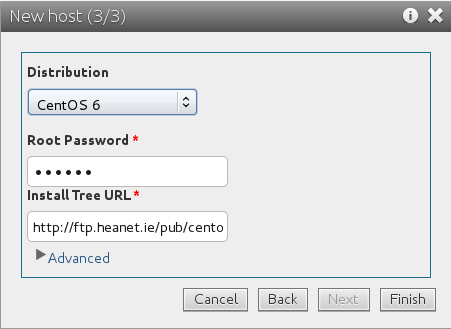
12. Pick a distribution
You must now pick an operating system distribution to install on this machine. We provide you with a sample CentOS 6 deployment, you can select it from the drop down menu. Set the root password and install tree URL (you should set this value in function of the geographical location of your Hypervisor, see this page). When done, click Finish.
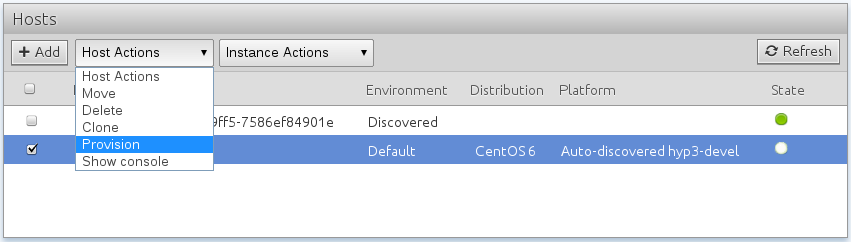
13. Provision the host
Your host is now ‘defined’ within ComodIT. This means that the description (platform, distribution, settings) has been stored in your organization. The next step for you is to trigger the deployment process. To do so, click on the host and pick the ‘Deploy’ action from the ‘Host Actions’ menu. Click Ok and ComodIT will start the deployment process. Your host will change from the ‘defined’ state to the ‘provisioning’ state. ComodIT will contact the Agent you have just installed and send a provision query to the selected hypervisor.
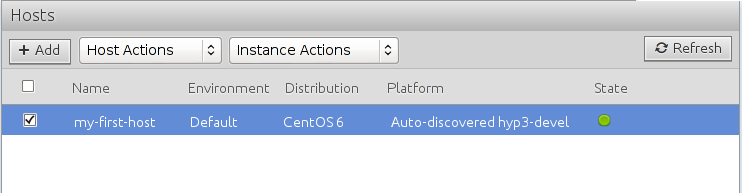
14. Host is ready for use
At the end of the install process, the machine reboots. When ready, a green light appears and the host state becomes ‘ready’. This means that the machine has been successfully deployed, our ComodIT agent has been installed, and is now connected. If we loose the connection, the state turns into a orange light. If compliance issues are detected on the host, it turns into a red light.
2016 © ComodIT. All Rights Reserved. Privacy Policy | Terms of Service