Writing your first application template
The following is a step-by-step tutorial to guide you in writing your first application template. We will reproduce the Web Server example application provided when you created your organization. If you get into troubles while following this tutorial, have a look at our support section for help.
1. Pre-requisites
We assume that you already have created an account on ComodIT and managed to provision a host using the provided templates. If you havn’t done it yet, please have a look at our various tutorials to help you in provisioning your first host.
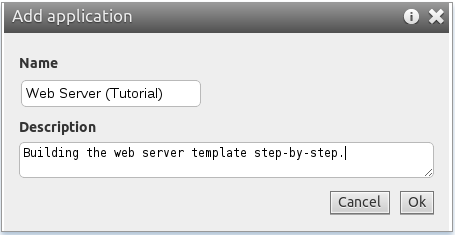
2. Create a new application template
Once logged in, navigate to the Applications section and click the Add button. A dialog prompting you for a name and description appears. Note that two applications can’t have the same name in one organization. The description is optional. Once you click Ok, an empty application is created and appears in your applications list.
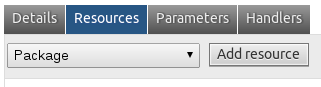
3. Add the required packages
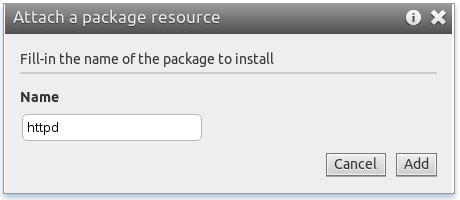
Select your application in the list and navigate to the Resources tab in the Application Details area. From this panel, you can add/edit the various resources required by your application. We’ll first add the required packages; we therefore select the ‘Package’ resource type and click the Add resource button.
In this example, we just need the httpd package.
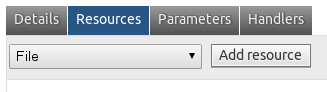
4. Add a configuration file
We want to be able to customize some configuration variables when deploying our application.
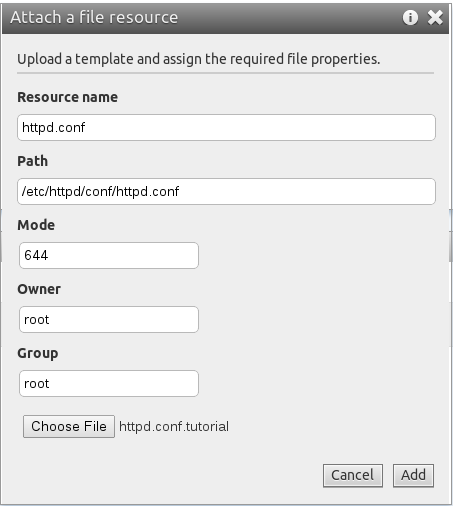
We therefore add a file resource with httpd.conf. Select the ‘File’ resource type and click
Add Resource.
Fill in the fields as displayed below, you can also upload the file content at this stage with the following example configuration file.
5. Parametrize the configuration file
The next step is to edit the configuration file and replace some of its content by variables that the user can change when deploying the application. Simply click the link to the file to bring the editor window.
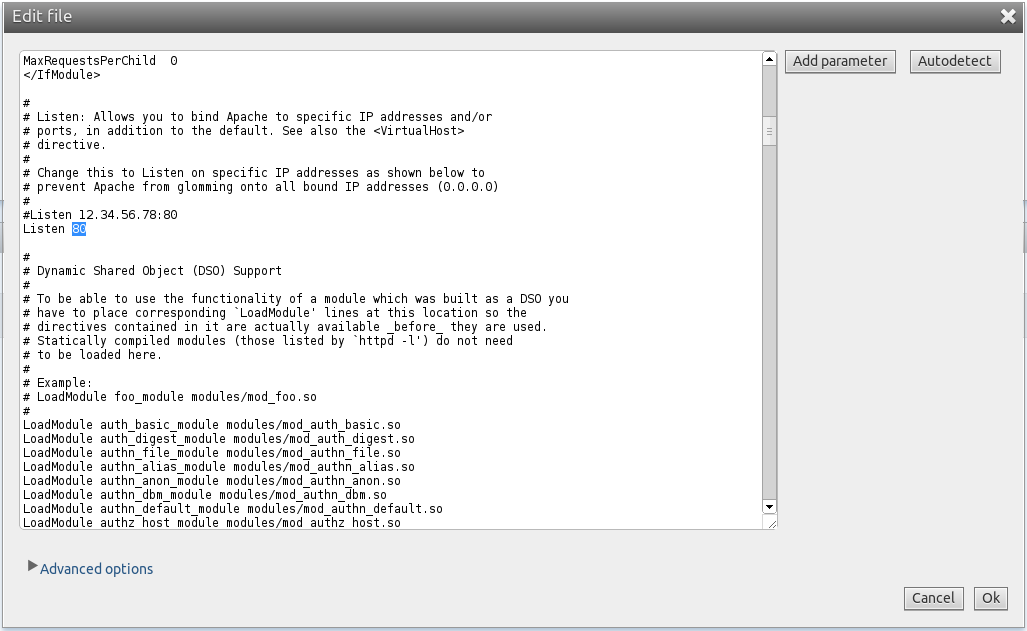
Inside the editor, find the line with the Listen directive. Highlight the value 80 and
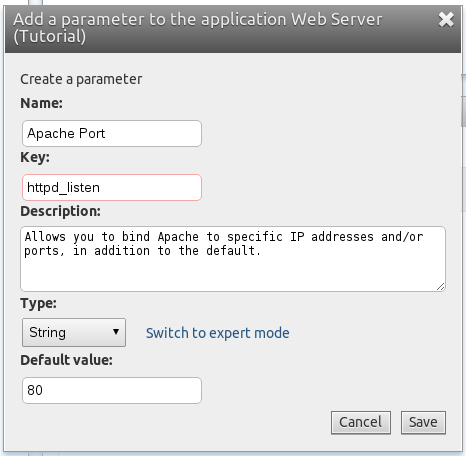
click the Add parameter button. A dialog appears to define a new parameter. You can see
that the default value is already set to 80 (the text you selected). Fill-in the dialog as
shown below.
Once you click Save, the value highlighted in the editor is replaced by a reference to the parameter you have just defined.
Listen ${httpd_listen}
Click Ok to leave the editor, saving the file and the newly added parameter.
6. Add a service resource
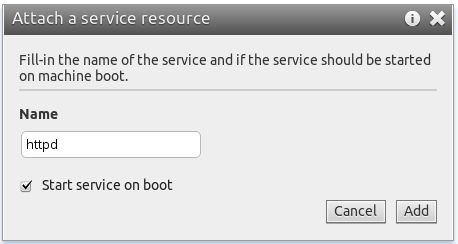
Finally, we must tell ComodIT that the Web Server application also depends on a httpd service,
and that this service should be enable when the host starts. Just pick the ‘Service’ resource type
from the list and click Add resource. Fill-in the dialog as shown below.
7. Link resources through handlers
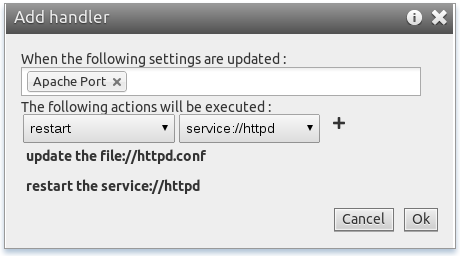
We have to do one last thing before we can use this application template. We must tell ComodIT what should be done when a user change the value of the parameter we have just created. To do so, we move to the ‘Handlers’ tab and click the Add handler button.
In this dialog we configure a new rule stating that when the ‘Apache Port’ setting is changed, the configuration file should be updated and the service should be restarted.
Our application template is now ready to use. We can add it to the configuration of a host and it will be automaticaly deployed.
8. Deploy the application on a host
Navigate to the ‘Hosts’ section and either create a new host or select an existing one. In the ‘Host details’ area, open the ‘Configuration’ tab. From there, you can add an application to the host configuration. When you click the + button, a dialog offers you to install an application.
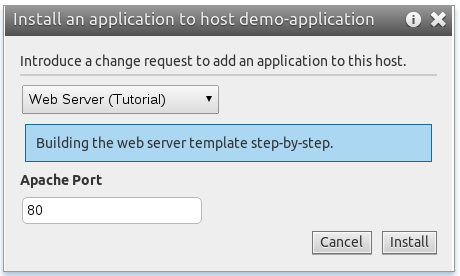
As you can see, the dialog offers you to change the value of the ‘Apache Port’ parameter. You can leave the default value and change it later. When you change it, ComodIT will know it has to update the configuration and restart the service.
2016 © ComodIT. All Rights Reserved. Privacy Policy | Terms of Service