Provisioning on OpenStack
The following is a step-by-step tutorial to get you started with ComodIT and provision your first host on OpenStack. If you get into troubles while following this guide, have a look at our support section for help.
1. Pre-requisites
a. You have a ComodIT account
We assume that you already have created an account on ComodIT and verified your email by clicking the link we sent to you. If you have issues subscribing to our service, please contact support.
b. You have an OpenStack account
We also assume that you have an OpenStack account and that you are the administrator of your OpenStack infrastructure. This implies that you should know the following details about your account (in particular, ‘region’ is not easily accessible to a normal user):
- your login,
- your password,
- a tenant/project name,
- a region,
- an authentication URL (for example ‘http://openstack.domain/v2.0/tokens’).
2. Insert ComodIT’s bootstrap image into OpenStack
ComodIT provides a bootstrap image (i386, x86_64) that should be accessible to your account in order to provision hosts. For example, here are 2 commands you may execute to insert the x86_64 image into Glance, OpenStack’s image service (we assume all required environment variables are set, see this page for an example):
wget http://dl.comodit.com/pub/bootstrap/cirros-5G-x86_64.qcow
glance add name=comodit-bootstrap disk_format=qcow2 container_format=bare < cirros-5G-x86_64.qcow
3. Log-in ComodIT for the first time
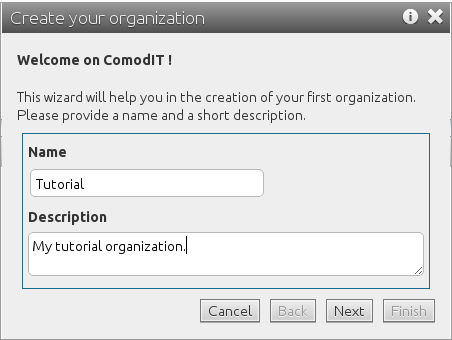
When you log-in for the first time in ComodIT, a dialog pops up and invites you to create your first organization. It will keep on re-appearing as long as you don’t have at least one organization in your account (either you have created it, or someone adds you to an existing organization).
4. Create your first organization
If you don’t yet have one, you first have to create a new organization. This organization will act as a container for your hosts and applications recipes. The organization can be shared between multiple users. Pick a name (has to be unique within the whole of ComodIT) and enter a short description (this is not required). When your new organization is created, it will also be populated with a sample distribution and application so that you can quickly start provisioning your first host.
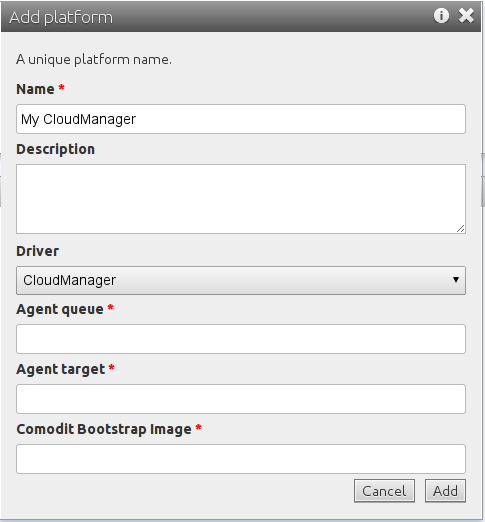
5. Configure your OpenStack account
In order to use your OpenStack account to provision hosts, you must create an OpenStack platform. Go to ‘Platforms’ section and click the Add button. You are presented with a new wizard, guiding you in the platform creation process.
You are now ready to provision your first host. Close the wizard and move to the ‘Hosts’ section if not already there. Click the ‘Add’ button and you a new wizard opens, guiding you in the host creation process.
6. Create a new host
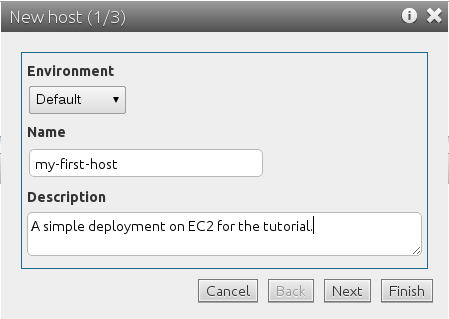
You can leave the environment as Default, pick a name and enter a short description. Environments help you group hosts within your organization (e.g. by type, geographies, teams, etc.). The name of the host has to be unique within a given environment. When you are done, click Next.
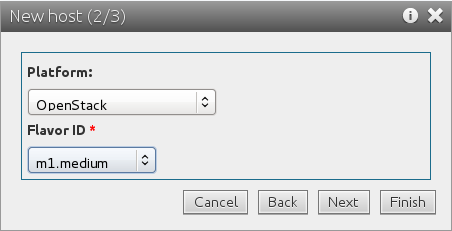
7. Pick a platform
The next step in the host creation process is to choose the machine’s characteristics. In this case, pick the OpenStack platform you have just created. Pick a flavor and click Next.
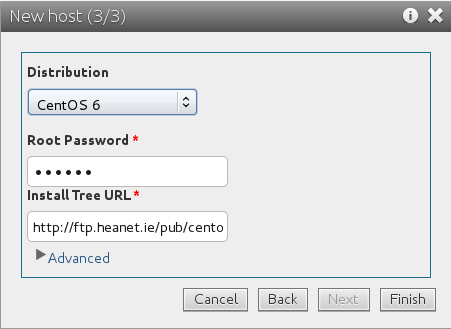
8. Pick a distribution
You must now pick an operating system distribution to install on this machine. We provide you with a sample CentOS 6 deployment, you can select it from the drop down menu. Set the root password and install tree URL (you should set this value in function of the geographical location of your OpenStack setup, see this page). When done, click Finish.
9. Deploy the host
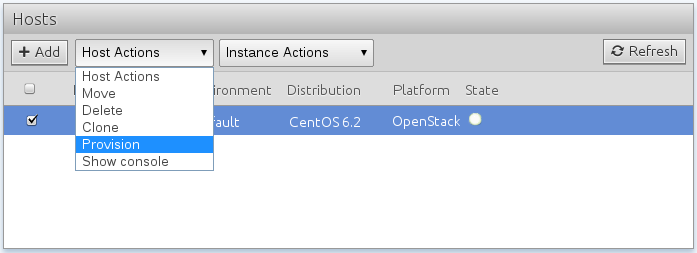
Your host is now ‘defined’ within ComodIT. This means that the description (platform, distribution, settings) has been stored in your organization. The next step for you is to trigger the deployment process. To do so, click on the host and pick the ‘Deploy’ action from the ‘Host Actions’ menu. Click ‘Ok’ and ComodIT will start the deployment process. Your host will change from the ‘defined’ state to the ‘provisioning’ state. If you double check within your OpenStack dashboard, you should see a new host has been created.
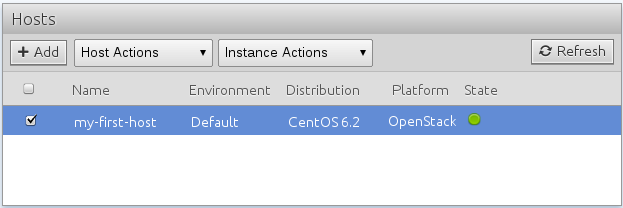
11. Host is ready for use
At the end of the install process, the machine reboots. When ready, a green light appears and the host state becomes ‘ready’ (you may need to click on Refresh button in order to see this). This means that the machine has been successfully deployed, our ComodIT agent has been installed, and is now connected. If we loose the connection, the state turns into an orange light. If compliance issues are detected on the host, it turns into a red light.
2016 © ComodIT. All Rights Reserved. Privacy Policy | Terms of Service